Controller Wiring
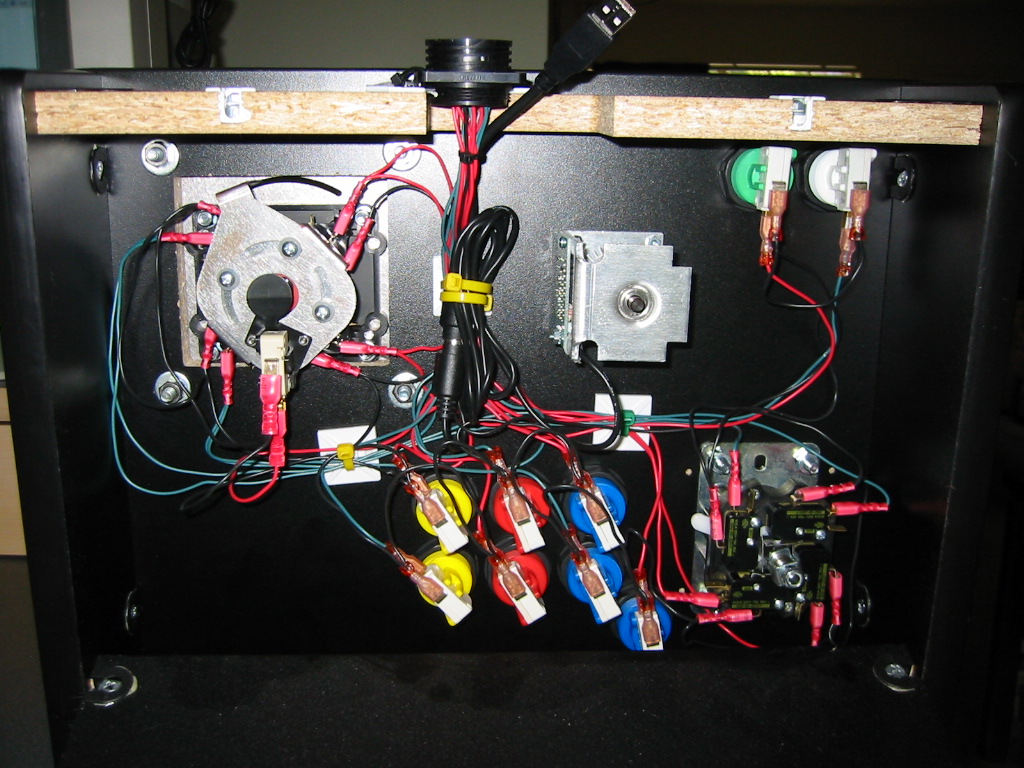
The picture shown here is the inside of one of my controllers. The USB cable wrapped in the center, is connected to the Slikstik Tornado spinner. The rest of the wiring is simple. See the diagram of the switches at Ultimarc's site. Check the switch markings on what ever controllers or buttons you get. They will all have NO (normally open), NC (normally closed), and a common. All the commons were daisy changed together and connected to pin 15 on the connector. See the wiring diagram of the IPAC. Everything else was single wires to the proper pins on the connector, except the joysticks/buttons that I shared. In my design, both boxes had 2 joysticks. 1 joystick was a Groovy Game Gear Top fire button for Tron. The top fire button was daisy chained with button 1 on the control panel. The left, right, up and down switches were daisy chained together. This meant, that either joystick could be used in any game. They acted as 1 joystick not 2 separate joysticks, it's important to note that because there are games that require 2 joysticks per player. This is also how I accommodated left handed users. One of my controllers has a Happ Universal joystick, which you can twist in place, for use with Q*bert or in the standard position for normal games. This was placed on the right side of the controller box, on the left side of the box, I mounted an Ultimarc T-Stick Plus for regular games. Again, the grounds and the movement switches were daisy chained, with 1 wire leading to the proper pin on the connector. The other controller box, had a T-Stick on the left and the tron stick on the right with the buttons and Tornado spinner in the center.
posted by hls @ 6:52 PM
![]()
![]()


0 Comments:
Post a Comment
<< Home